Running Diabetes: Taping the CGMS sensor
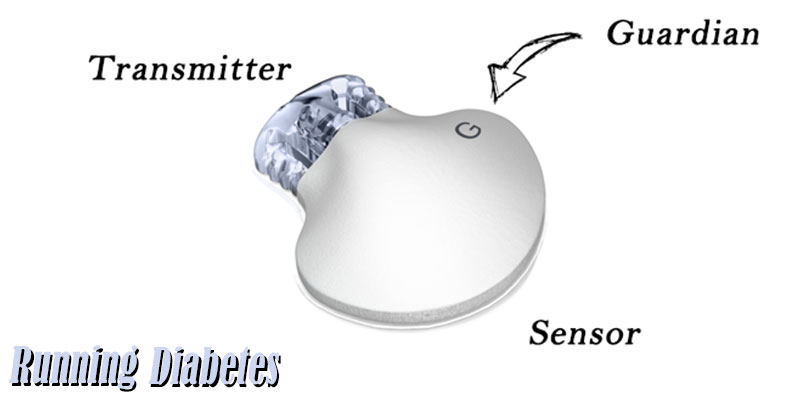
Just recently I was asked about how do I keep my CGMS sensor from getting undone during my long sweaty runs. The CGMS is a subcutaneous sensor that connects to a transmitter that conveys information for a device, insulin pump, or phones your glucose level readings. This happens about every 5 minutes or so. This can be very helpful especially on long training session, hard workouts, and events.
You see, as you probably know by reading some of my other posts, I run a lot, and especially during the summer humidity and temperature, I sweat a lot making it challenging for the adhesive of the tape to stay put. For some, the sensor will last 6 plus days depending on the sensor, transmitter battery life, and body glucose levels conditions.
I have been very lucky to have found a good process that has worked for me during the long miles. Most of the time the taping has lasted the life of the sensor. Here are the steps I do when getting the new sensors ready.
The first step is to find a great location to insert the sensor. For me, I have tried my abdomen for years with really great success. But after many years I noticed that the accuracy started to be affected. More about that is to be discussed in another post. It has been just in the past three years that I switched to my legs with similar if not better results. I use the same taping method for both locations. Select an area with enough skin area, smooth and that will rarely get snagged by clothing.

The second step is the prep area. I sometimes shave a bit the area to make sure the tape will have solid contact with the skin. Sometimes a little bit of hair is ok, but keep in mind that anything between the skin and the adhesive tape is going to start reducing the effectiveness of the adhesion. In addition, I also clean the area with an alcohol swab. This not only prevents infections but also remove any oils or other particulate that will prevent good adhesion.
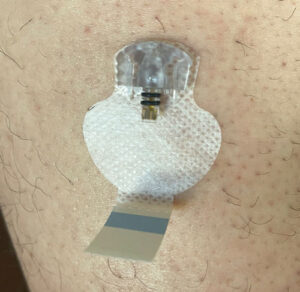
Now I am are ready to insert the sensor. Once inserted and the under tape of the sensor is secured I put the 1st tape application. This covers a portion of the sensor tape area as well as portions of the top of the sensor. I make sure the sides are well attached by flowing my thumbs outwards to make sure the tape is secure with my skin.

Once I know the sensor is secured, I attach the already charged transmitter. I try to do this very carefully as I do not want to pull or push the sensor out of position while inserting the transmitter. Once inserted I wait for the green blinking light indicating that it is fully and correctly connected. Once getting the ok, I secure the overhanging tape from the sensor to secure the transmitter in position. Once again I make sure that both the sensor tape system and the additional tape are well secured by pressing the different areas where there is tape to skin contact.
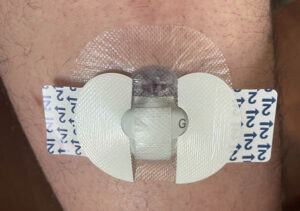
Now, this is the extra step I take that I think makes a great deal of difference in terms of securing the sensor to the skin. I do add another tape and overlay on top of the sensor and transmitter but this time it is turned 180 degrees. For the narrow portion of the tape, I make sure to position it in such a way as to cover the area where the sensor and transmitter connect to secure it from moving. The rest of the tape helps hold the transmitter secured next to the skin.
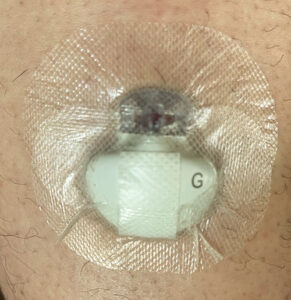
Once again I use my thumbs to make sure the tape is secured, removing any air bubbles and flattening any creases that might have been created during the application. One final visual inspection and I am set to go for the next 6 plus days and many running miles.
On average this taping process has allowed me to secure the CGMS for the length of the sensor. The only thing is that after 5,6 days I need to pay attention if any of the tape starts to peel. But normally this is not a problem.